Vow of the Disciple
- Fireteam
- 6 players
- Released
- Mar 2022
- Location
- Savathûn's Throne World
Overview
Enter the Sunken Pyramid, read its symbol language, overcome the Caretaker and Exhibition, and confront Rhulk.
Encounter references, maps, loot, and secrets are separated below for fast fireteam access.
Guide
Encounter Challenges
Challenge - Swift Destruction
Swift Destruction: In the Acquisition encounter, all three Unstoppable Abominations must be killed in short succession.
Throughout the Acquisition encounter, Unstoppable Abominations will spawn near each Obelisk in the arena. By the time your fireteam uncovers all three Glyphkeeper symbols, there should be an Unstoppable Champion near all three Obelisks. To complete this challenge, all three Champions must be slain in a few seconds.
The easiest way to complete Swift Destruction is to kill the Champions right before (or after) you cleanse an Obelisk of symbols, stunlocking them until your raid team is ready. Have all three pairs prepare their Unstoppable counter. Count to three, then everyone will stun and kill their respective Champion. Repeat this for each Obelisk cleanse. The window is somewhat generous, but try to kill your Champion the second it's stunned.
Challenge - Base Information
Base Information: In the Caretaker encounter, you may only grab one icon at a time.
For this challenge, your Obelisk runners may only grab one icon at a time. The icon can be different with each grab, but you can only carry one icon at any given moment. This challenge is fairly easy and just makes the pre-DPS phase a little longer. Assign three or four players as runners to speed up the encounter. It does put a little more pressure on your stun pair, but as long as they're consistently stunning the Caretaker, you'll have more than enough time to cleanse all Obelisk symbols to start the DPS phase.
Challenge - Defenses Down
Defenses Down: In the Exhibition encounter, each player may only kill one Taken Knight.
Guardians with the Leviathan Crystal artifact must defeat Taken Knights to extend their timer throughout the Exhibition encounter. Each fireteam member may only kill one Taken Knight for this challenge, meaning you'll need to rotate the crystal buff to different people for all three rooms. Since there are seven Knights in total, this challenge also forces you to skip one.
We recommend skipping the second Taken Knight in the first room and assigning your team into pairs. Each pair will use the Crystal in their corresponding room. For example:
- Intro and Room #1: Guardians #1 and #2.
- Room #2: Guardians #3 and #4.
- Room #3: Guardians #5 and #6.
Be sure that the first Crystal wielder of each pair does not use an artifact in the previous room. For example, Guardian #5 should not grab any artifact in the second room and use the Aegis in the first room.
A good artifact rotation looks something like this:
- This refers to the Crystal in the intro room; room one shouldn't rotate the crystal to anyone.
Challenge - Looping Catalyst
Looping Catalyst: During the first half of the Rhulk encounter, your fireteam cannot lose the Leeching Essence buff.
The challenge for Looping Catalyst is to... do the encounter. At least one fireteam member must have the Leeching Essence buff during the first half of the encounter. It doesn't have to be the same person, and you can split the buff as normal. If all six players don't have Leeching Essence, Rhulk will spawn a shard above his head for your team to regain the buff, failing the challenge. In essence, just make sure that your runners and retainers are constantly splitting the buff after each dunk, as per usual.
Losing the Leeching buff after purging Rhulk's forcefield does not void this challenge. Dunking at the last two totems simultaneously also won't fail this challenge.
Challenge guide link:
Maps & Callouts
Callouts
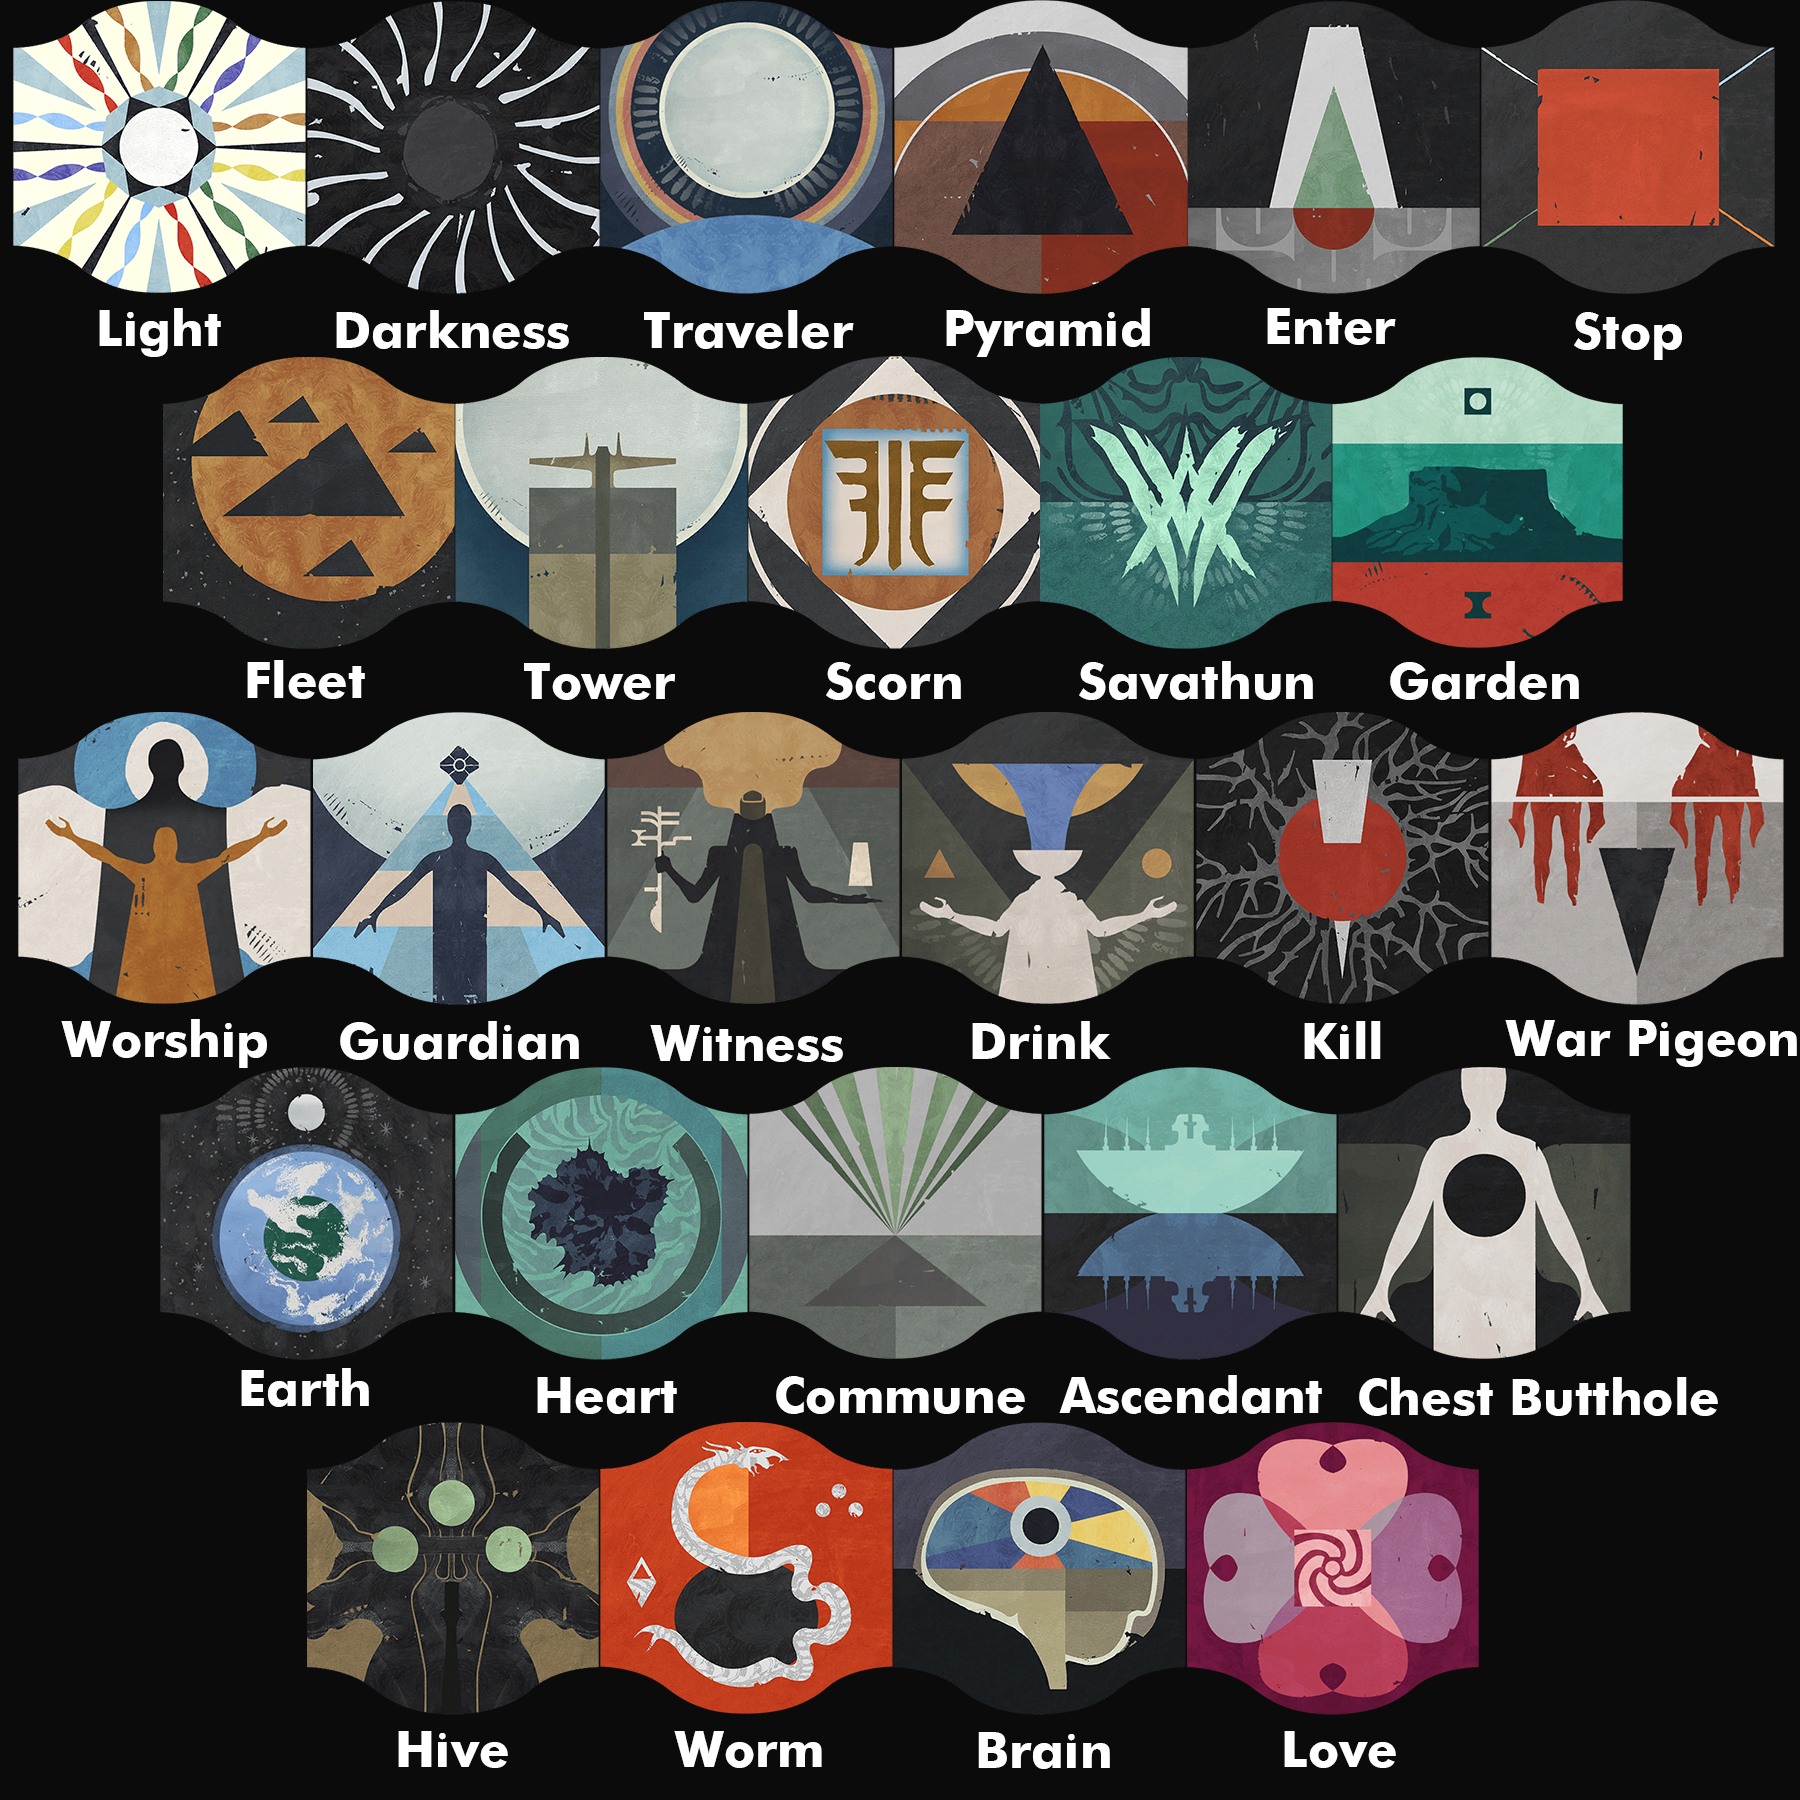
Acquisition
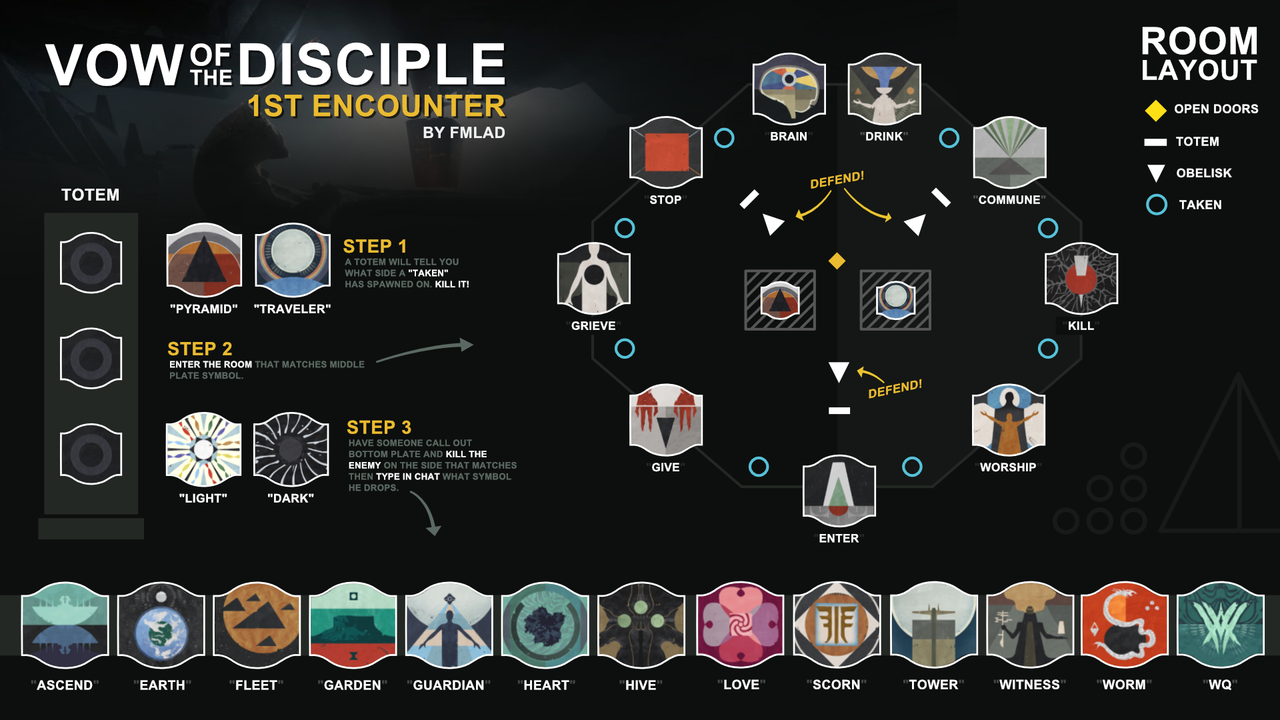
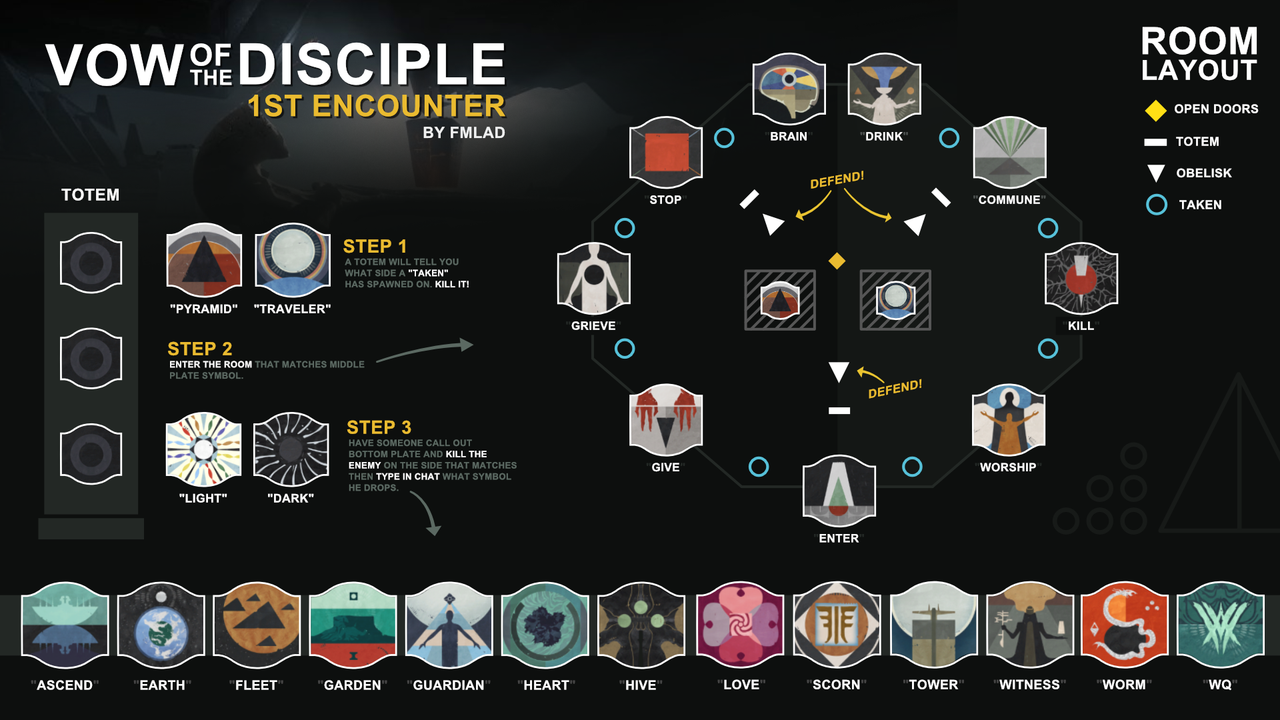
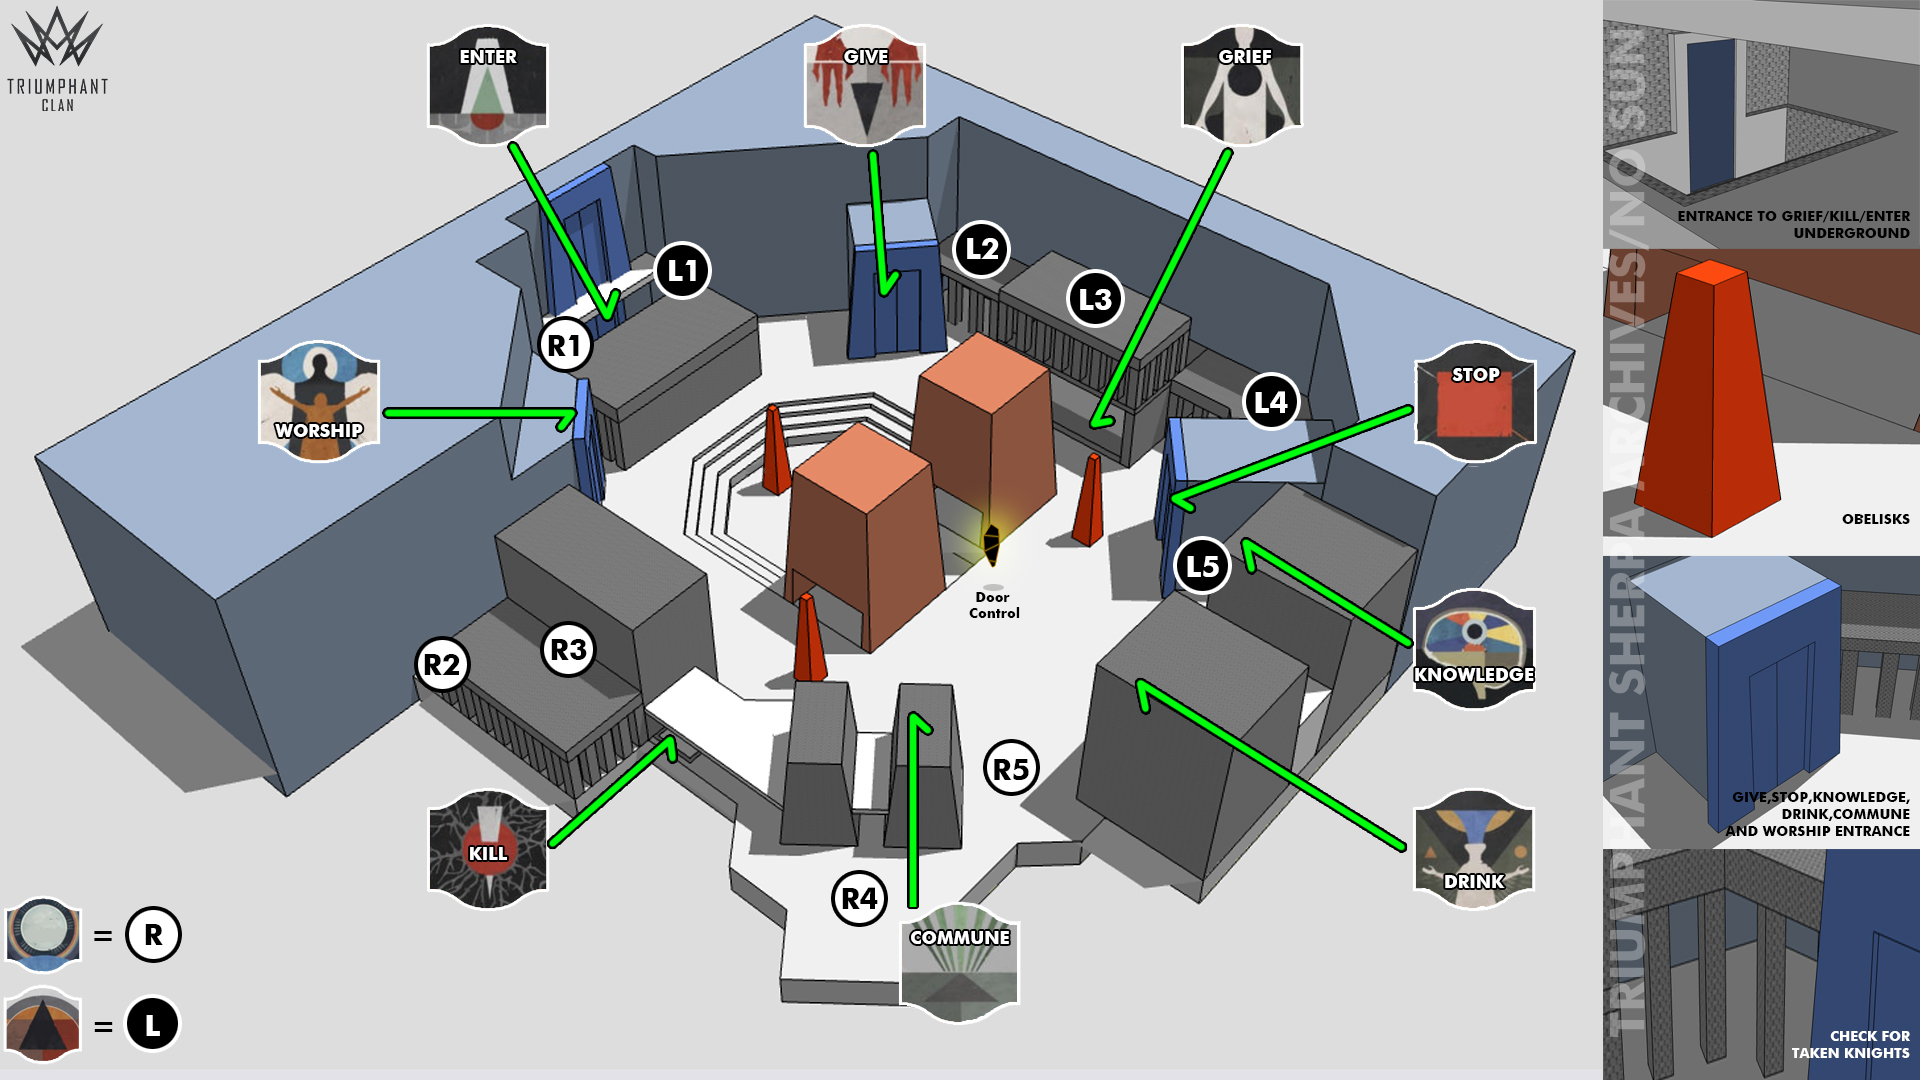
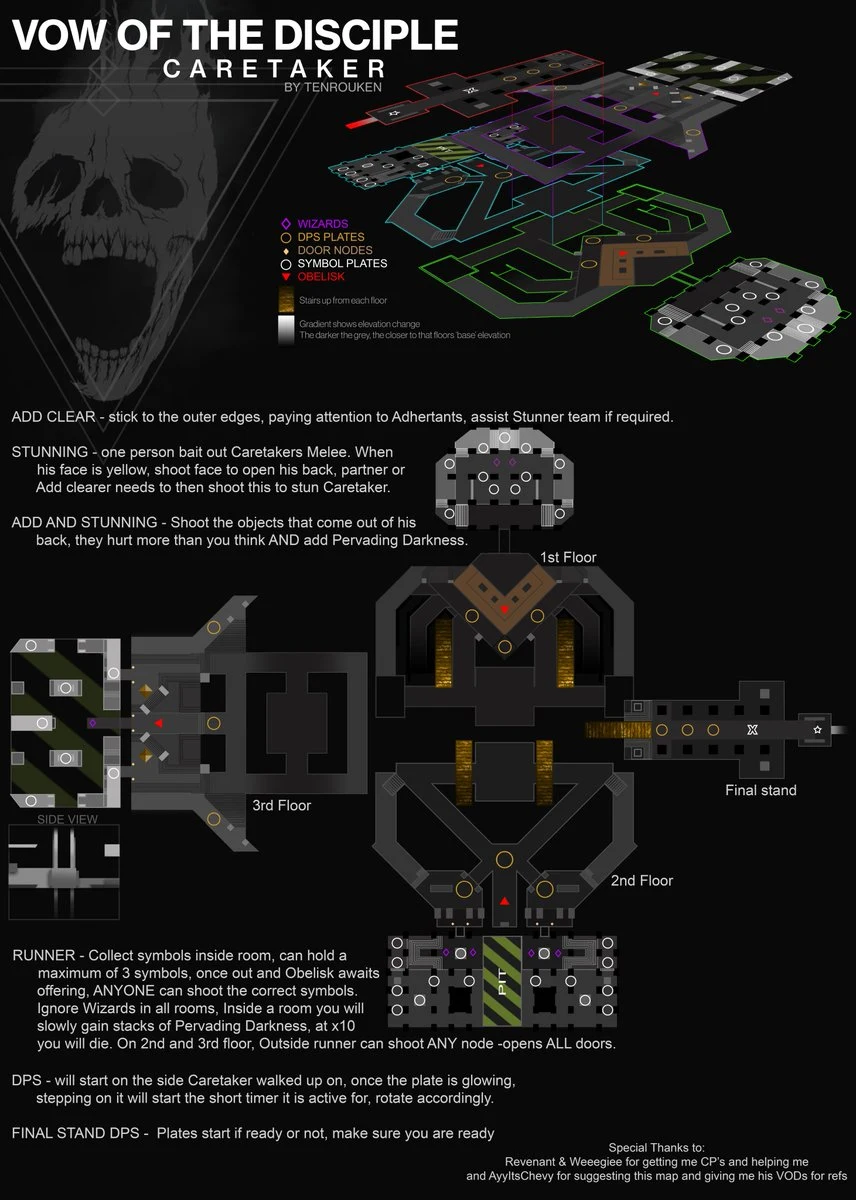
The Caretaker
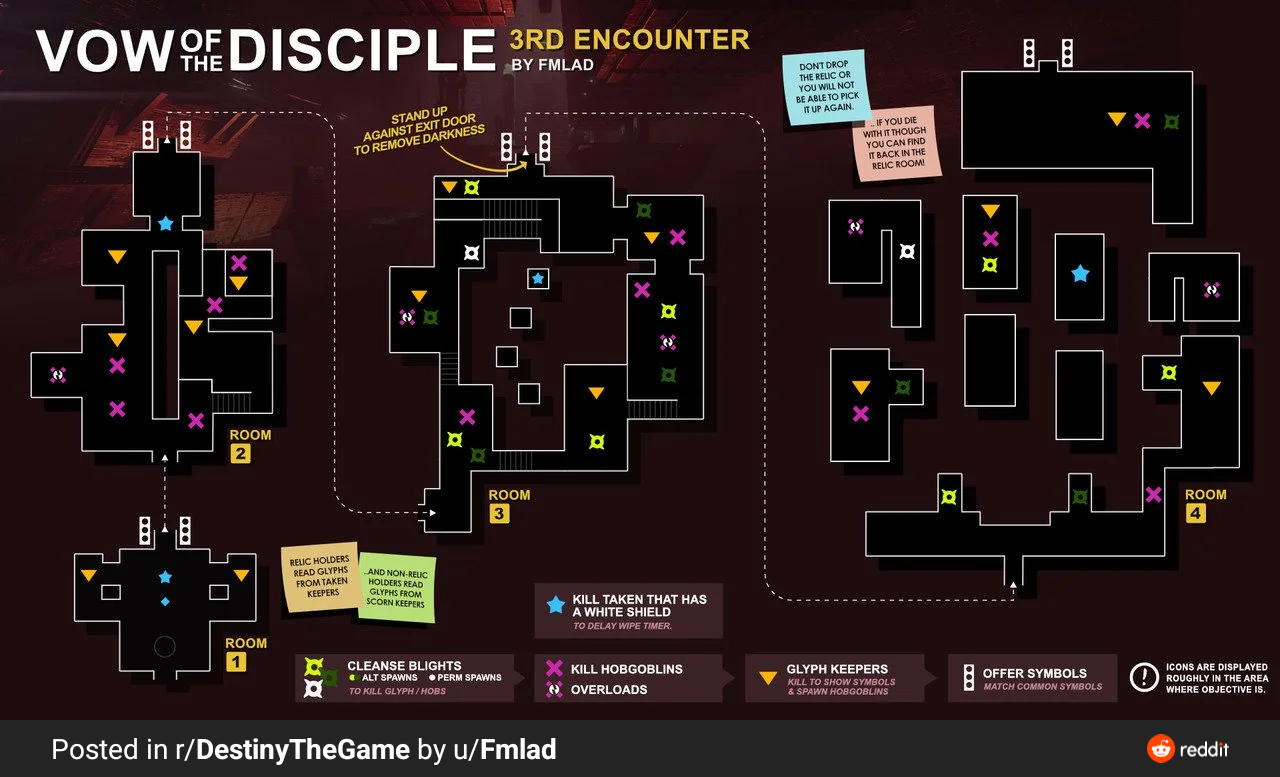
Exhibition
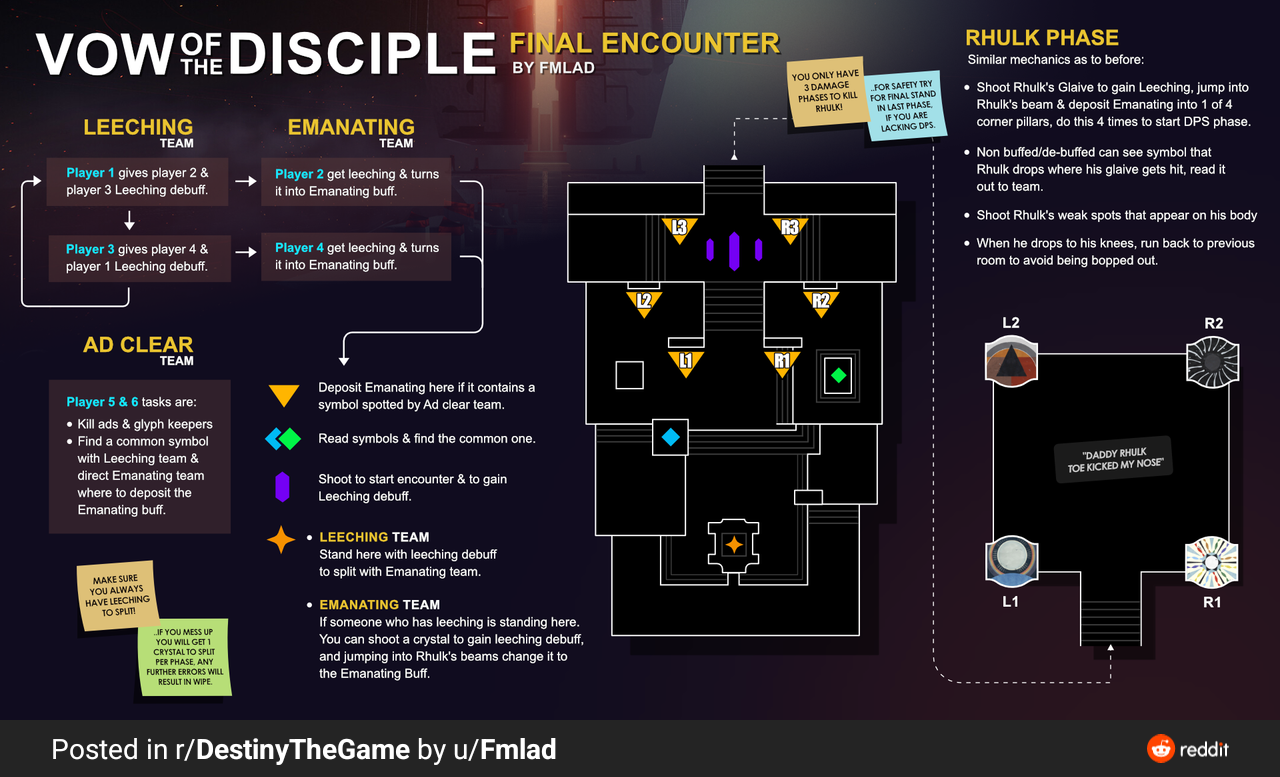
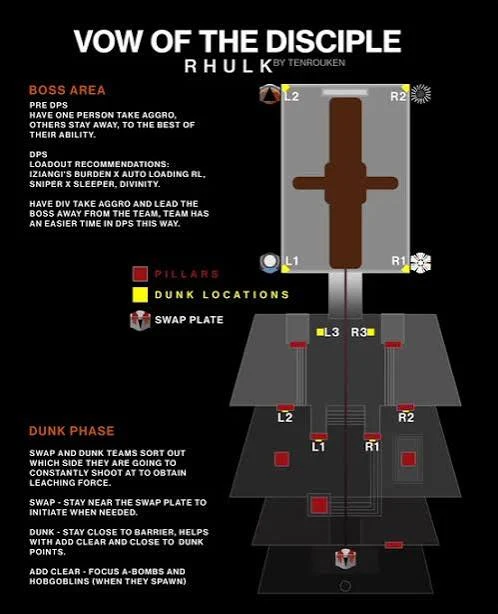
Rhulk, The First Disciple
Loot
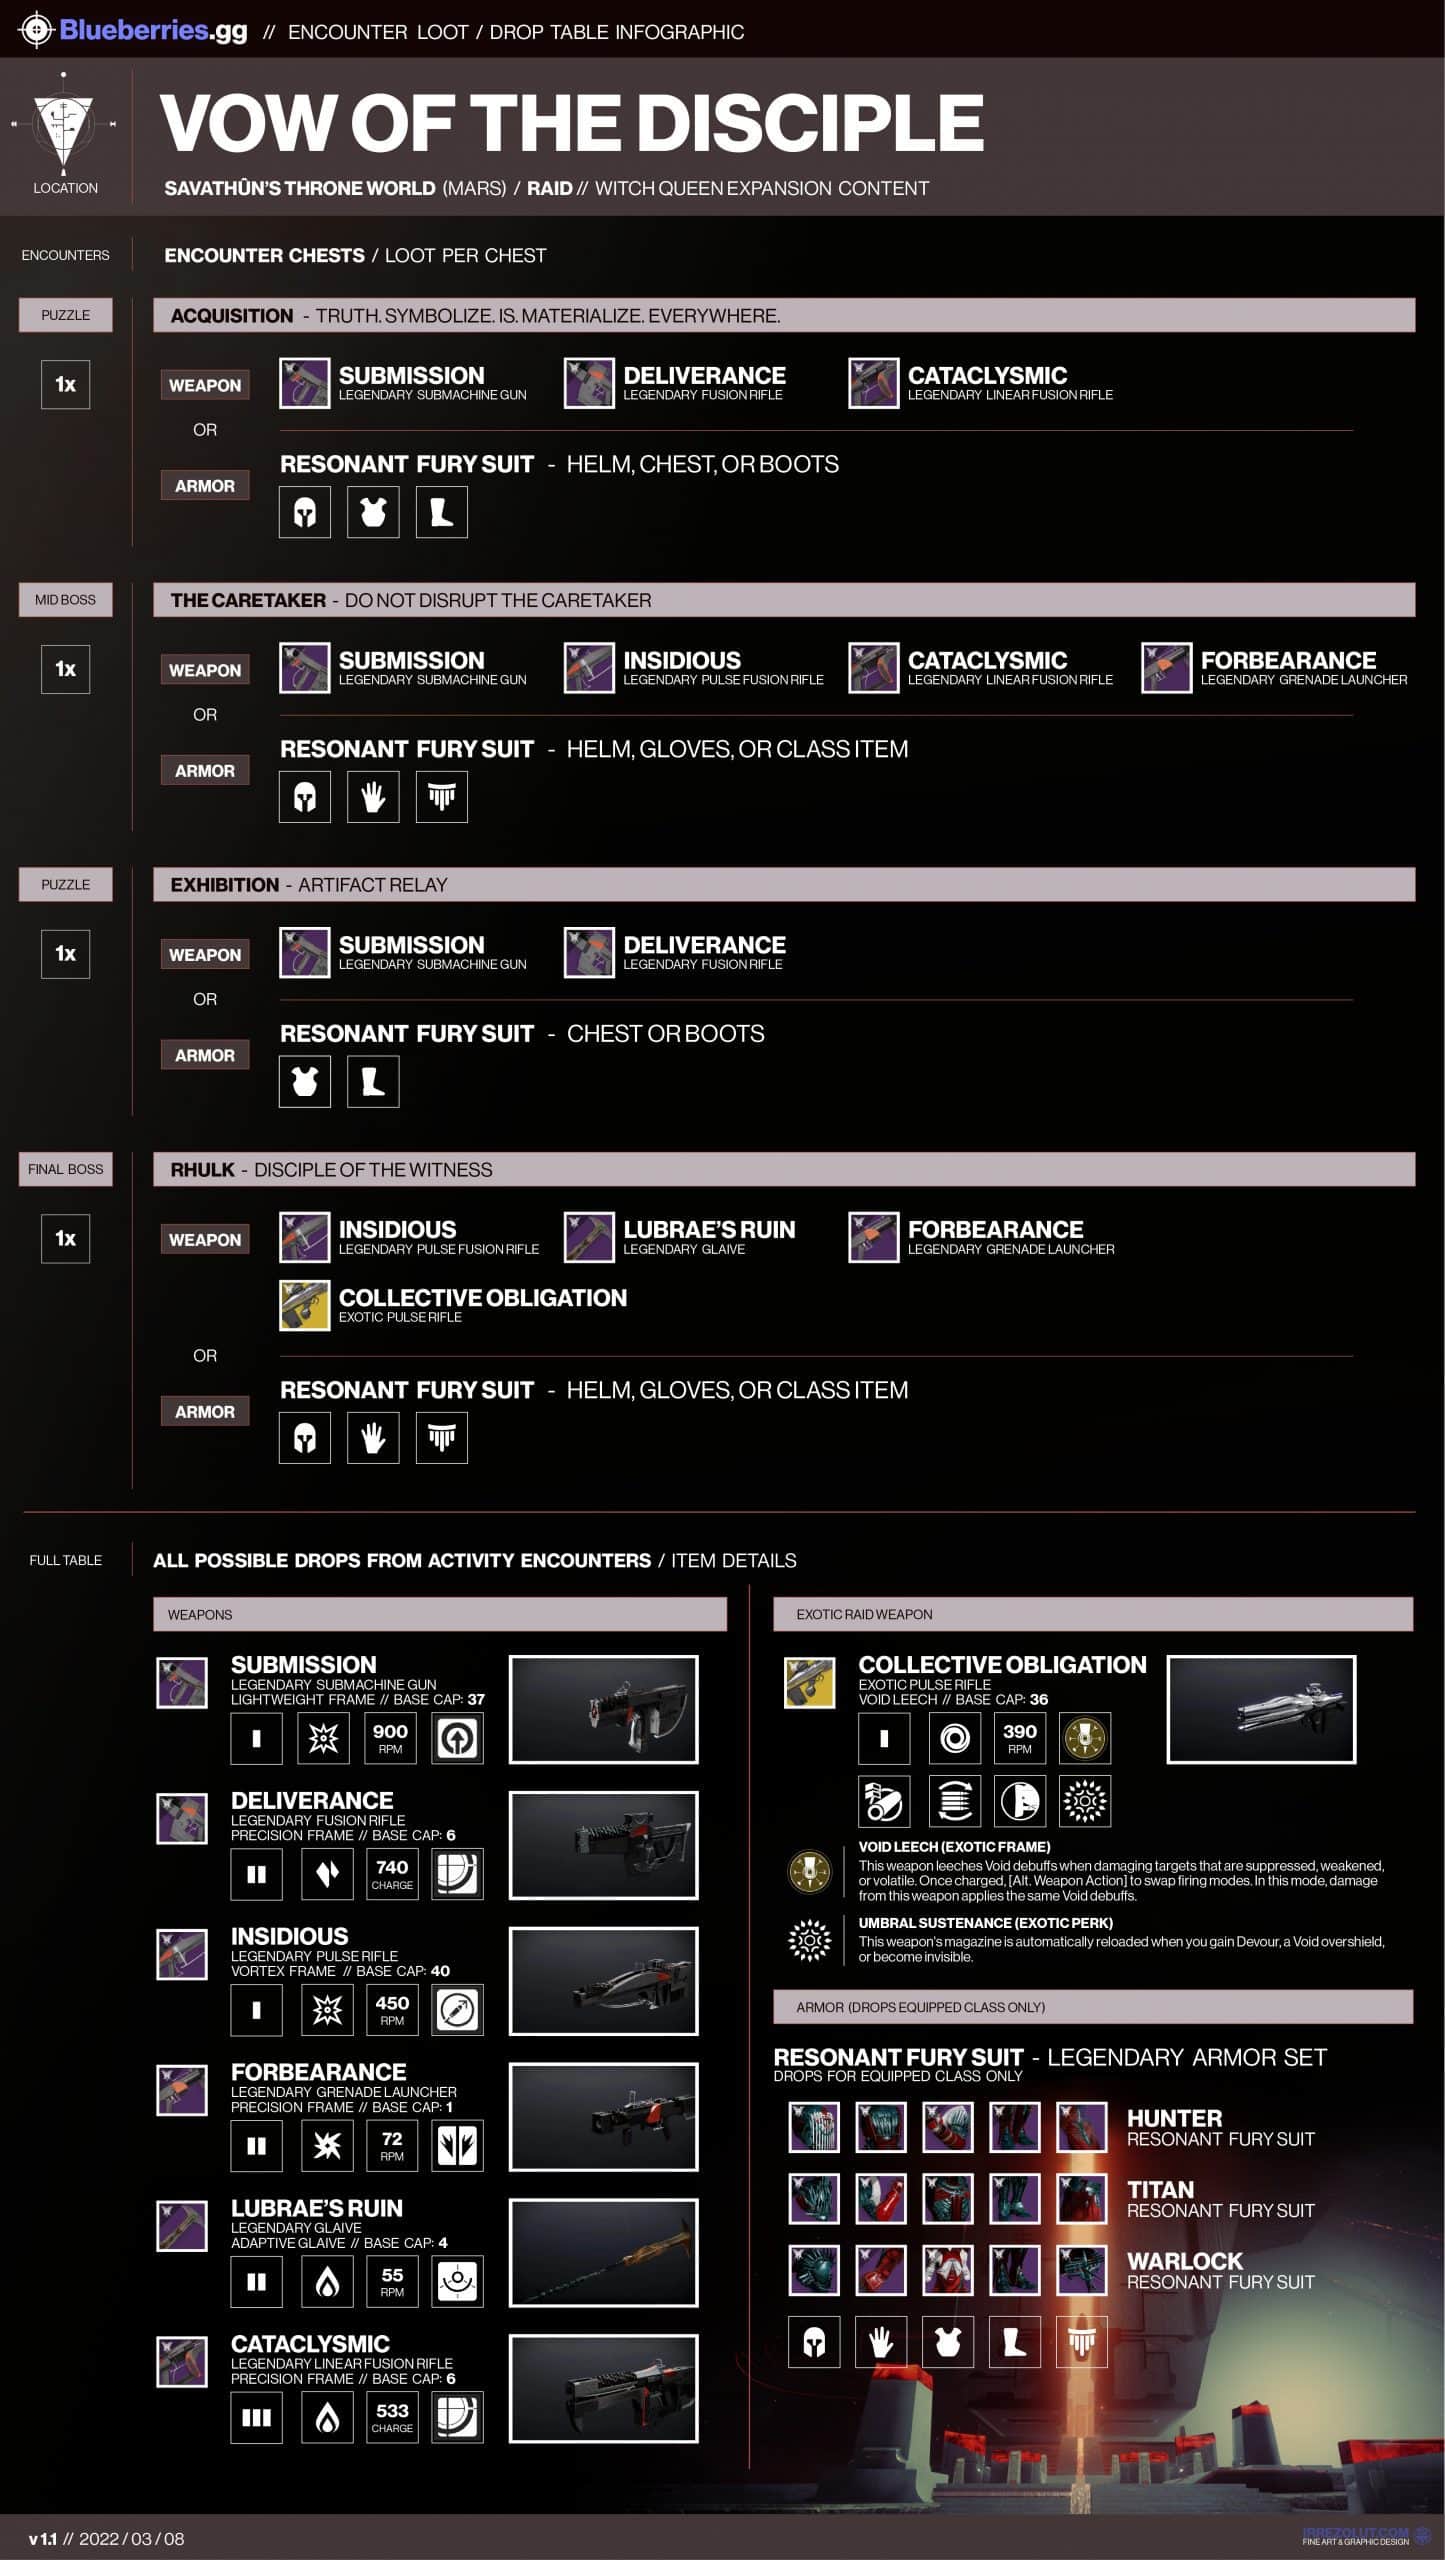
Blueberries.gg loot tableView the complete sourced reward breakdown →
Secrets & Collectibles
Secret Chests
- During the entrance encounter.
- After Caretaker, before Exhibition — before the end of the jumping puzzle.
Bonus Chest
Based on the 3 symbols you see on the totem after the entrance encounter, a bonus chest can be triggered.
- Pyramid: just after the dropdown after the totem.
- Give: just before the first encounter, after the frozen silhouettes.
- Darkness: in the first encounter room.
- Traveler: after the horse statue.
- Worship: after the second encounter.
- Light: during the jumping puzzle, statue with doors on either side.
- Stop: further along during the jumping puzzle.
- Guardian: after the third encounter, up the stairs on the left side.
- Kill: after the Guardian door, in the area going up floors.
Text & image guide by /u/EainFull bonus chest walkthrough →
The existing secret-room crystal route is grouped here with its location images and instructions.
Secret Rooms
Pyramid Room
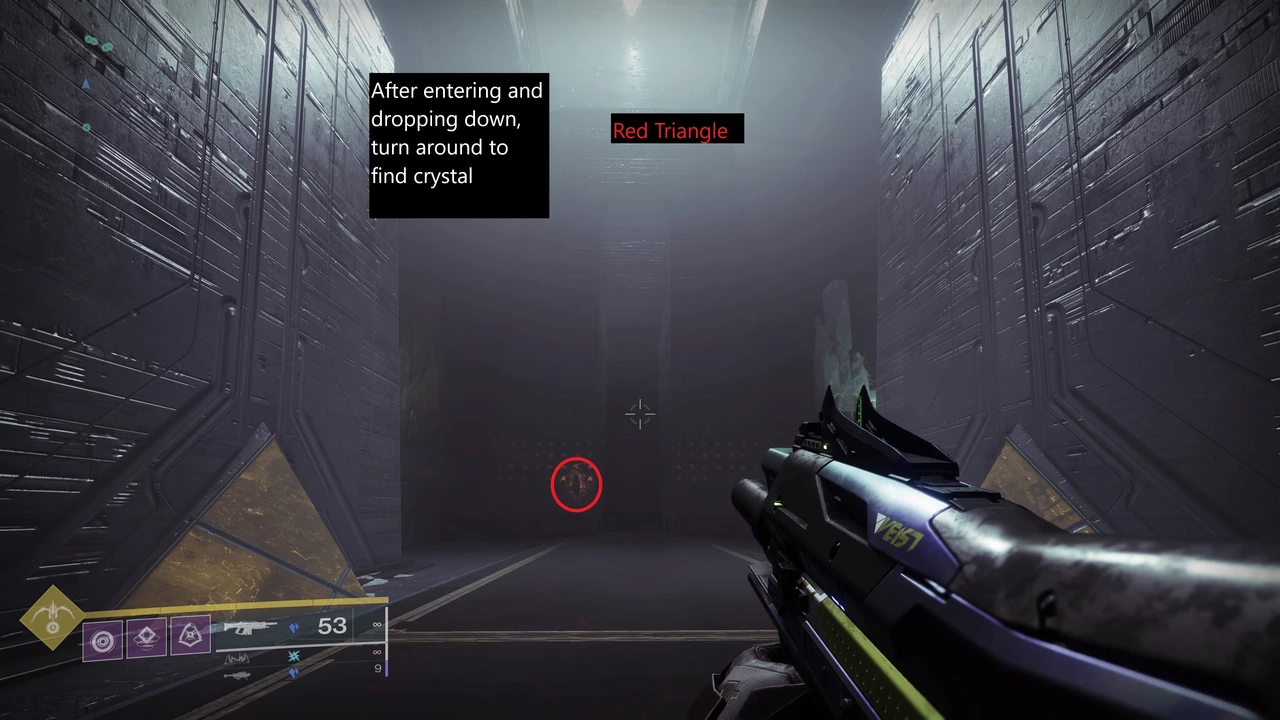
When you enter the pyramid and drop down, turn around and you'll see the crystal
War Pigeon Room
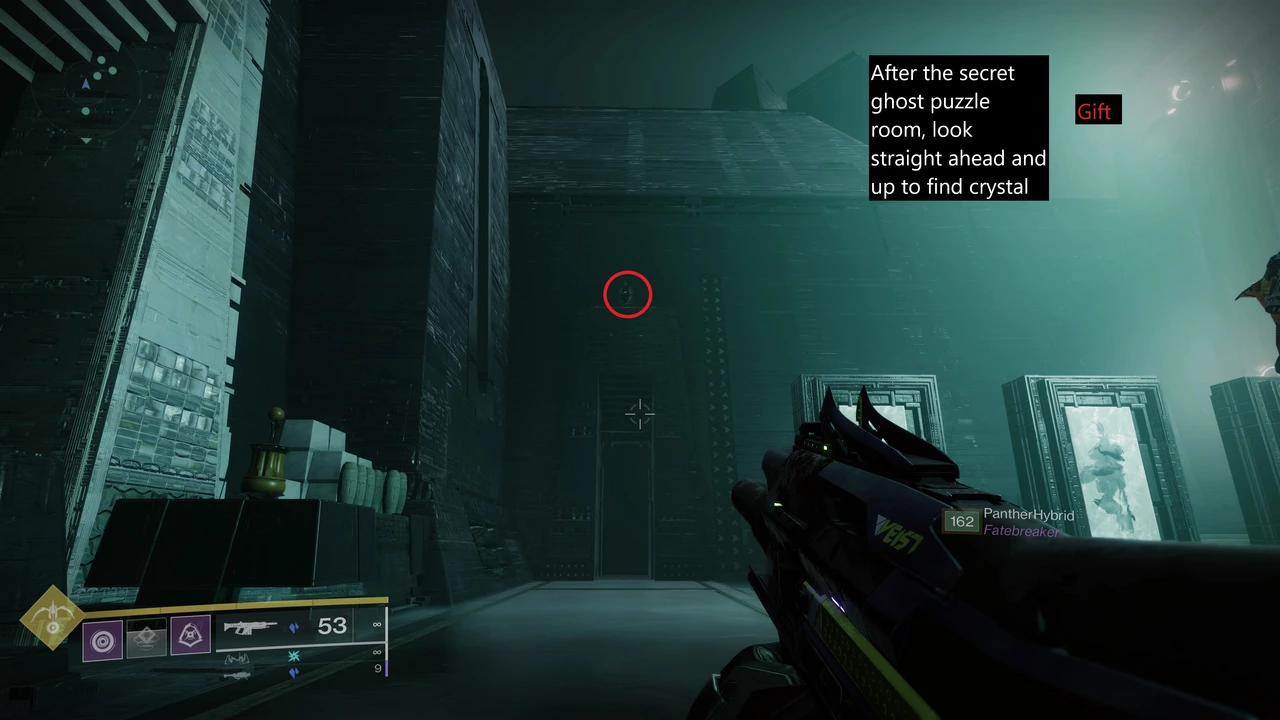
After the room with all the symbols for the Ghost Shell, look straight ahead.
Darkness Room
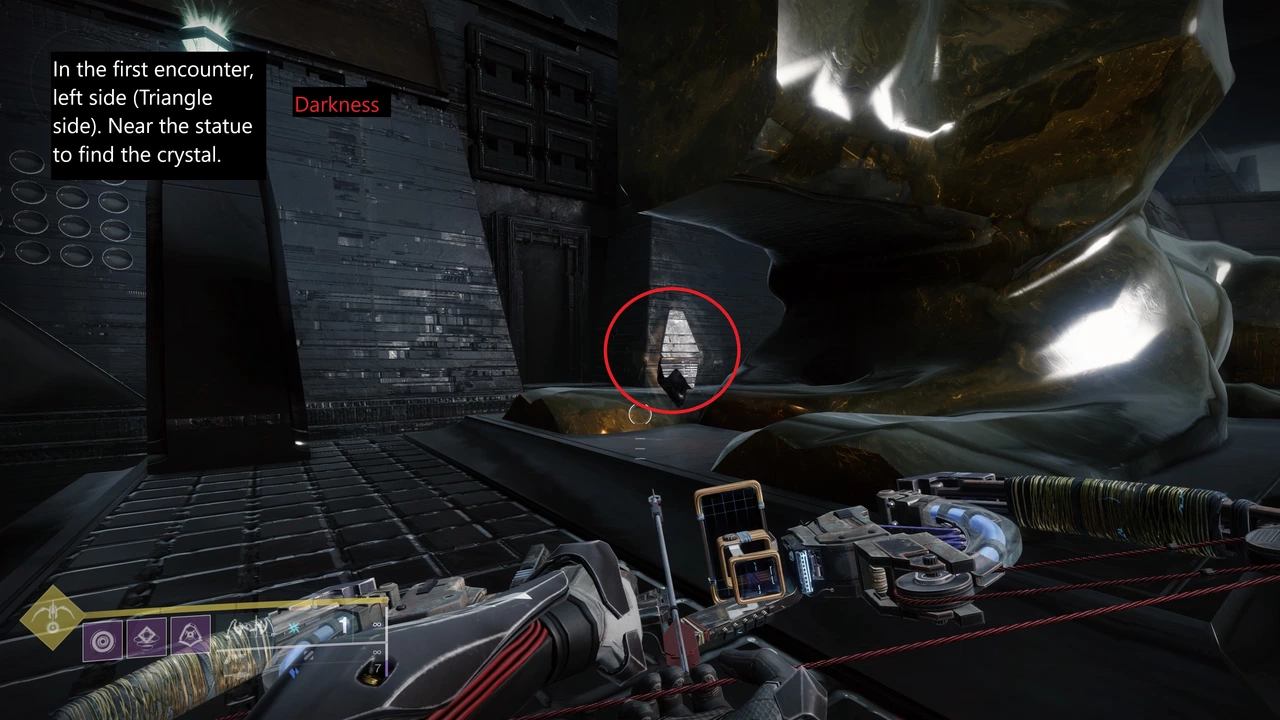
In the first encounter on the red triangle side (left side as you enter the arena). On top of one of the roofs you'll find a statue. The door is behind said statue.
Traveler Room
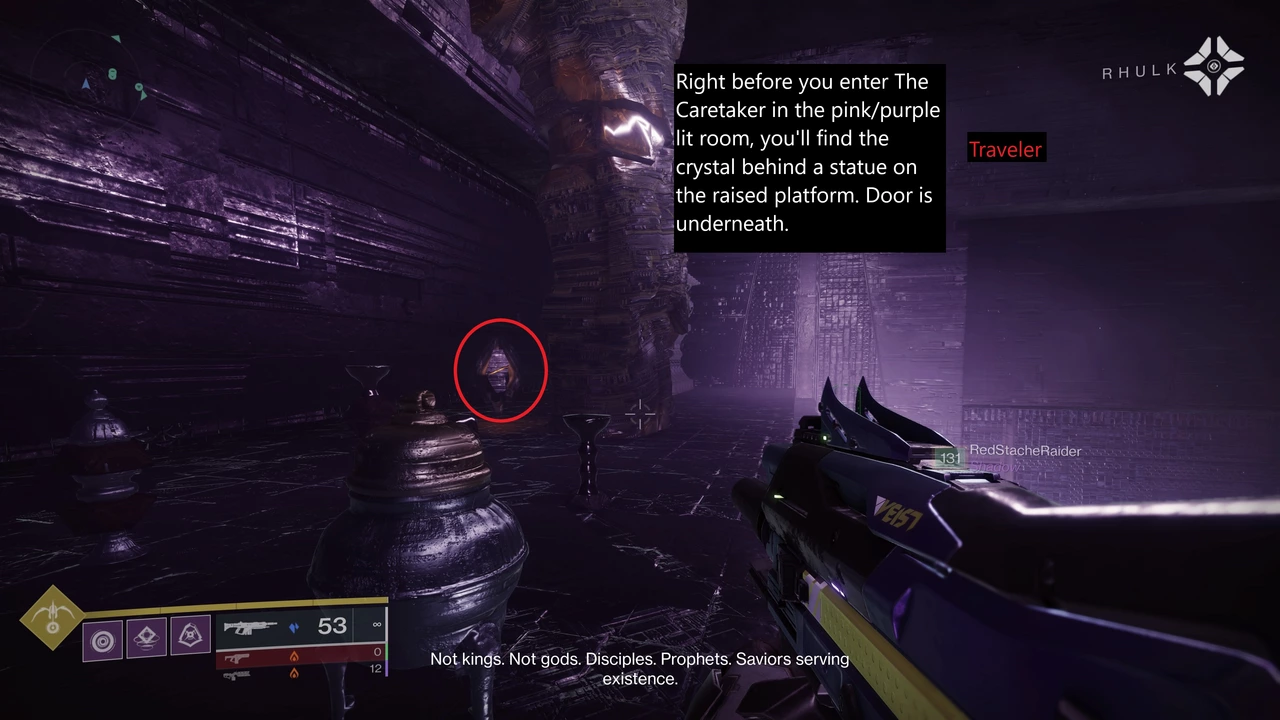
After the first encounter. Run until you hit the room before The Caretaker (Pink/Purple lit room). You'll find the crystal behind a statue and on top of the platform. Room is underneath.
Worship Room
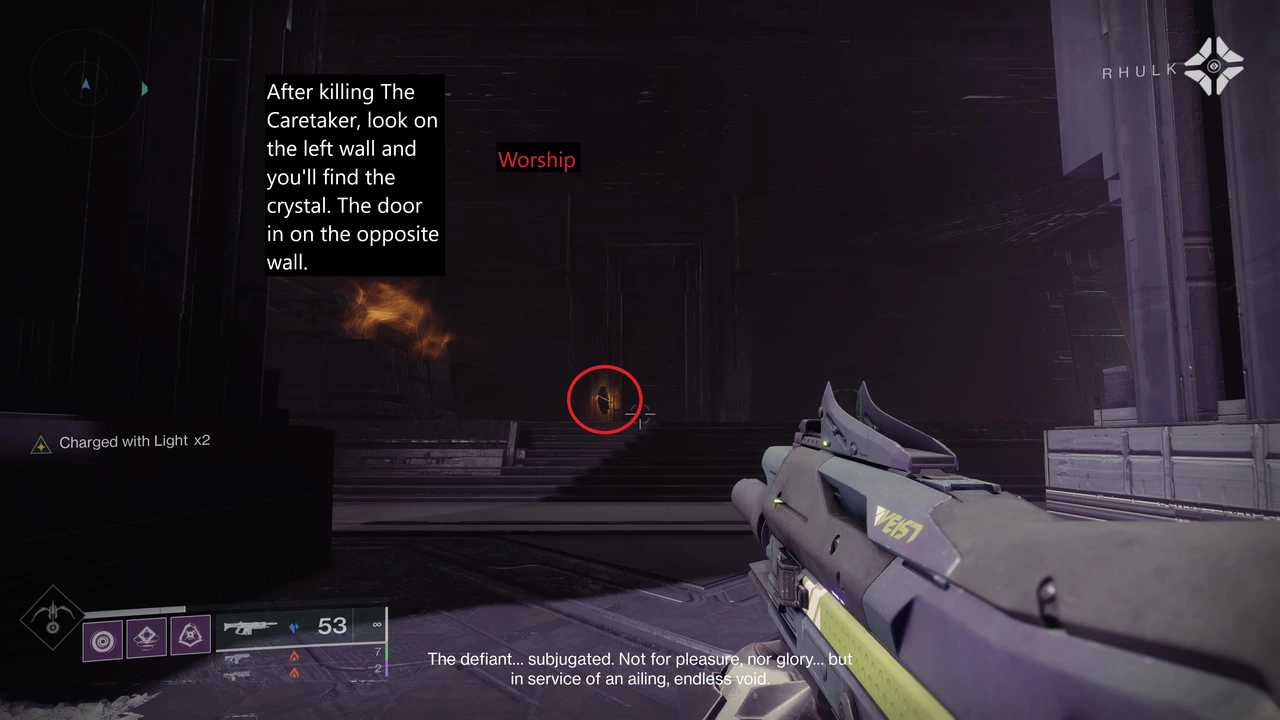
After killing The Caretaker, look on the wall to find the crystal. The door is on the opposite side (forgot if I mixed the door and crystal but they're on opposite sides).
Light Room
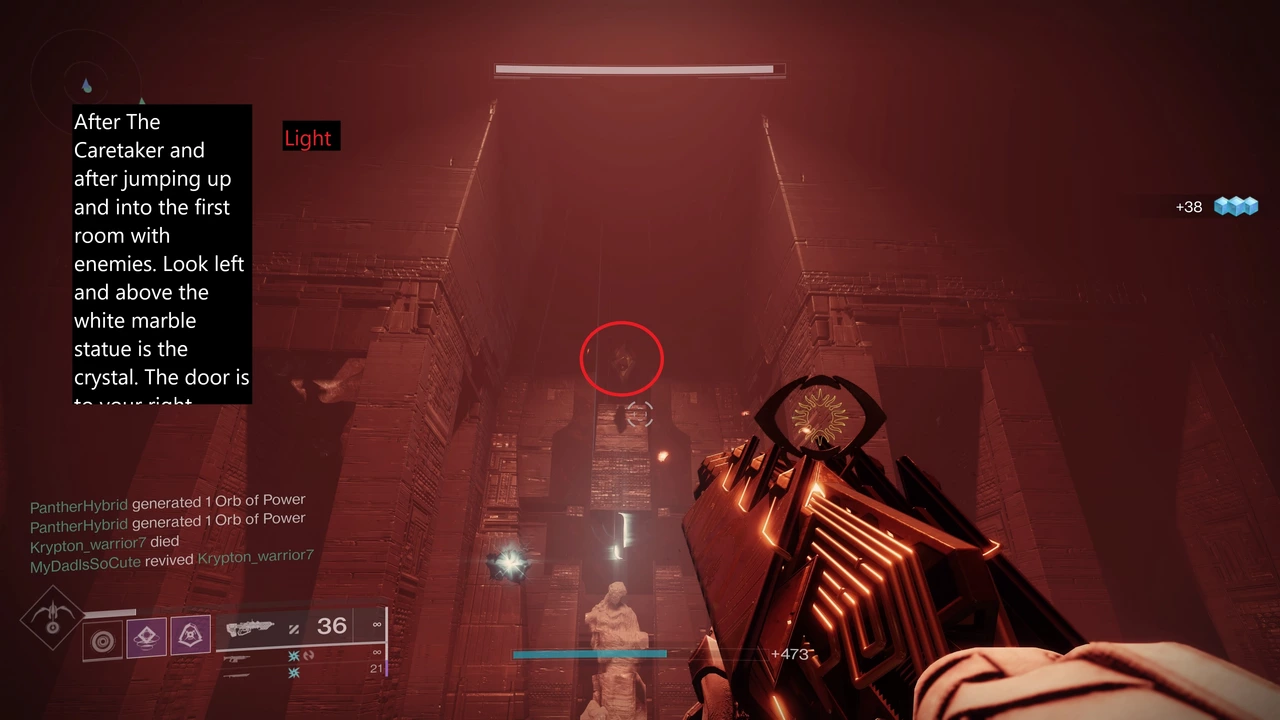
In the jumping puzzle area. When you hit the room with enemies (before the prophecy wall), look to your left and above a statue. Door is to your right.
Stop Room
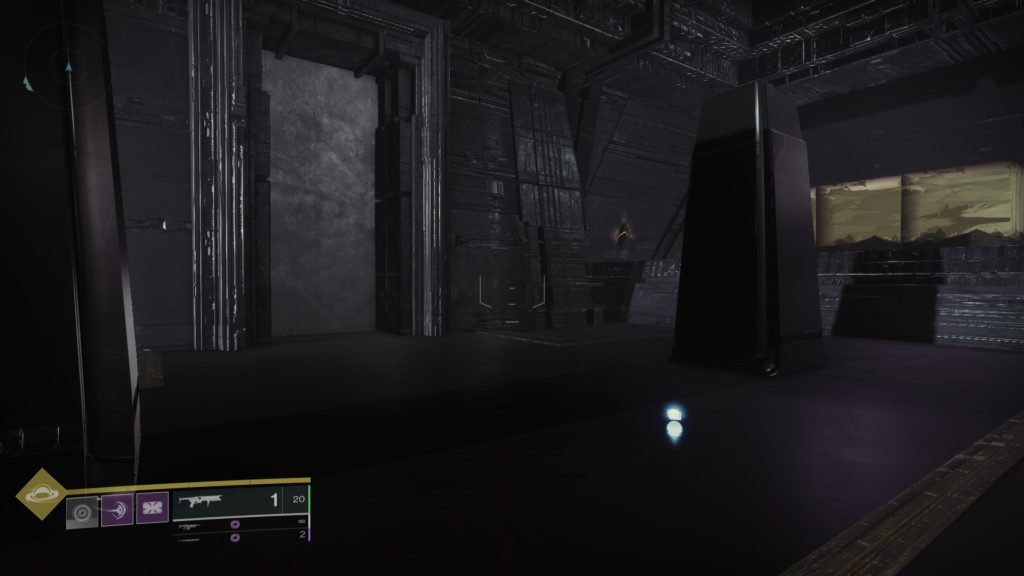
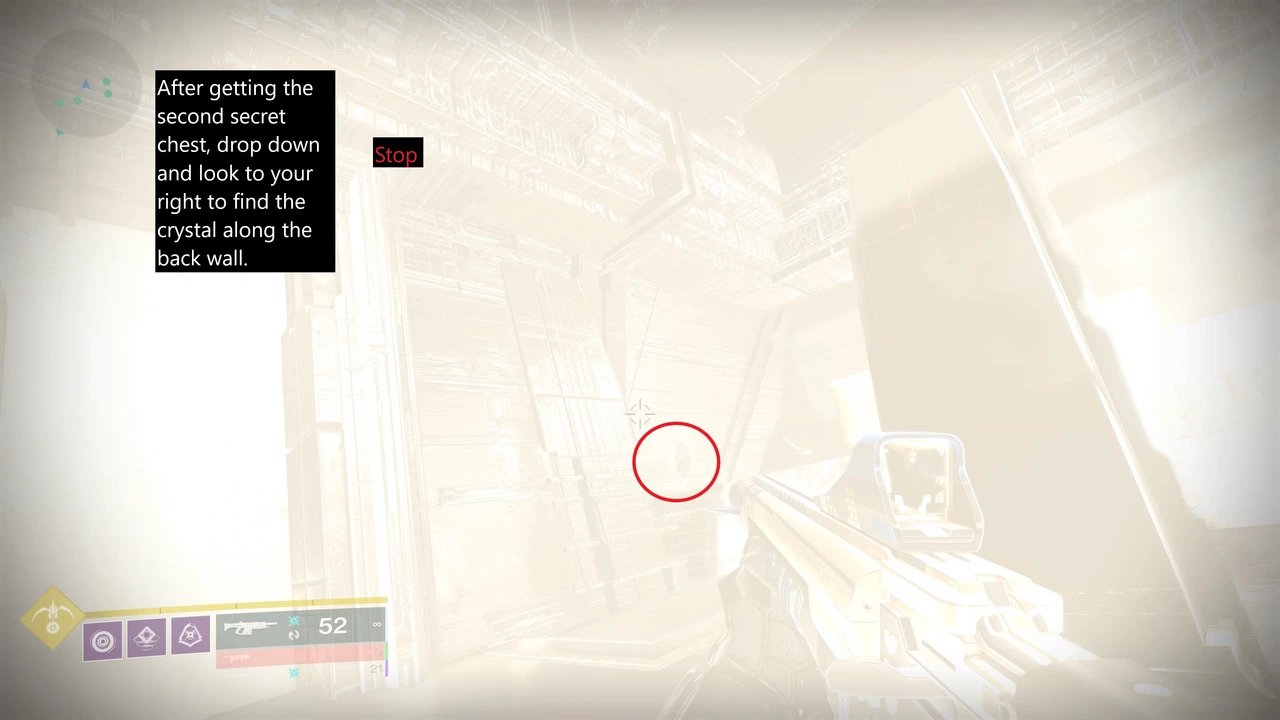
(Sorry for picture. I think something blew up) But after the second secret chest in the jumping puzzle, drop down and the crystal is along the back right wall.
Guardian Room
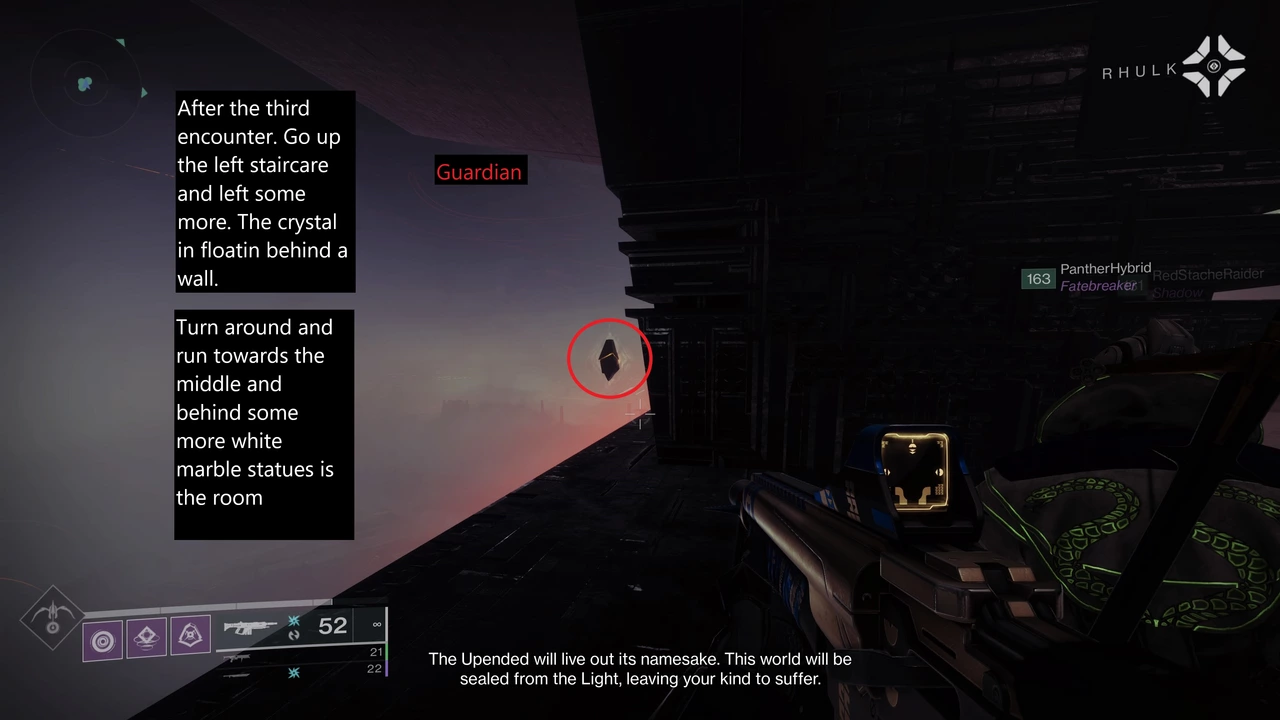
After the third encounter, run up the left side and on the outer edge. The room will be behind you in the middle area behind some statues.
Kill Room
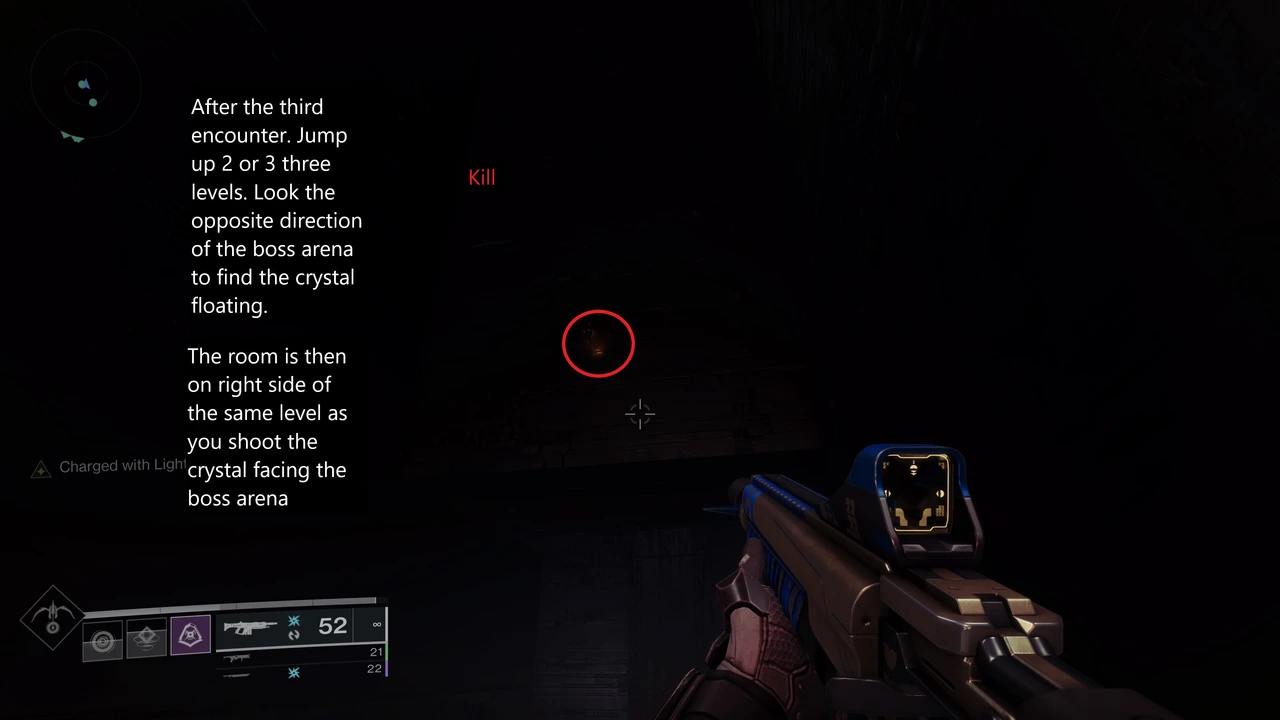
After the third encounter, jump up two levels (maybe three). Turn around away from the boss arena and you'll see the crystal floating.